
Welcolme to the first ever Just Add Ink Blog Hop brought to you by our amazing Design Team.
So here’s how it works…..There are 10 stops on our Blog Hop (Just Add Ink and each of our 9 Design Team members), but the hop is set up in a loop so it doesn’t matter where you start. All you need to do to follow along is click the blog hop button at the end of each post and you’ll be taken to the next stop! The cool part of that is that you can do the Blog Hop whenever you want.
Each week at Just Add Ink, we host a challenge, and this week we’ve incorporated it into our Blog Hop. So the challenge is for you to Just Add… A Technique From The Blog Hop. Easy! There are 9 fantastic techniques to choose from (with a tutorial to match); the hard part will be making the choice! Add your entry via Mr Linky on the Just Add Ink blog.

The Technique I am showing you today is the Ink & Alcohol Technique
Using Re-inkers, Isocol Alcohol, Glossy White Card and a Cotton Ball you can create funky and unique Backgrounds.
Step One – Squeeze some Isocol Alcohol (which you can buy from your Supermarket or Pharmacy) onto a Cotton Ball. Add some dots of Ink from your reinker onto the cotton ball. You can use several colours.

Step Two – Dab the ink onto Glossy White Card. It dries quickly – and you can go over the same area a couple of times if you wish.

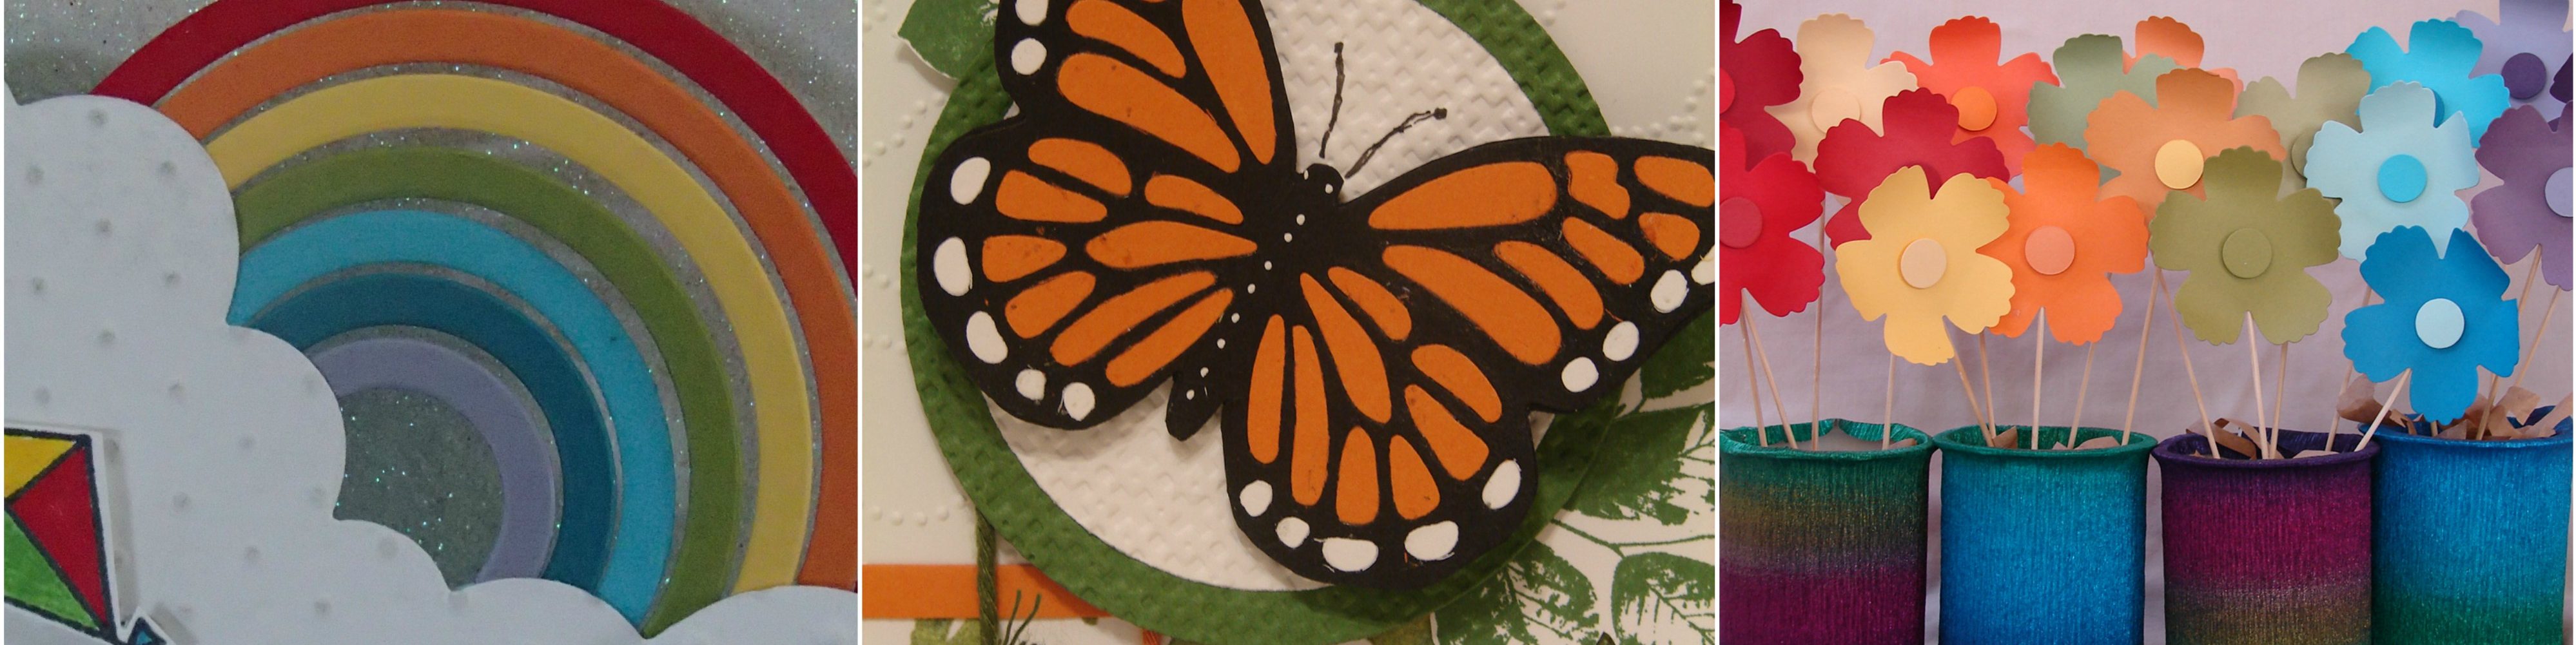
This creates fabulous multi-coloured backgrounds which you can use on your projects.
Another option is to Stamp an image with Versamark and emboss it before covering with Alcohol Ink.

Once your Alcohol Ink has dried – polish off any excess ink with a Tissue. This really makes the image stand out.
 I have used both of these pieces for my Card.
Card Assembly
- Cut out flowers and punch the edges of the strip with the Eyelet Boarder Punch.
- Stamp the image with Pink Pirouette Ink into the Pink Pirouette Card. Sponge edges of Pink Pirouette Card with Pink Pirouette Ink.
- Use the Corner rounder punch to Round the corners of the Pink Pirouette Card.
- Fold the large Rich Razzleberry card in half.

- Punch out 3 or 4 Leaves of Kiwi Kiss with the Bird Punch.
- Attach the Ink Alcohol strip to a strip of Rich Razzleberry Card. Attach some Rich Razzleberry Ribbon over the Ink Alcohol strip.
- Adhere Whisper White & Rich Razzleberry Circles together.

- Adhere Rich Razzleberry/Ink Alcohol strip to Pink Pirouette Card.
- Attach 3 Old Olive Brads to bottom left corner of card.
- Adhere Pink Pirouette Card to main Rich Razzleberry Card.
- Adhere leaves to back of flowers.
- Using Dimensionals, stick flowers to Circle.

- Stamp a sentiment on scrap Whisper White Card with Rich Razzleberry ink.
- Punch out using Large Oval and sponge edges with Pink Pirouette Ink. Also punch a Scalloped Oval in Rich Razzleberry.
- Use Dimensionals to stick Sentiment Oval to Scalloped Oval.

- Use Dimensionals to stick Circle (with flowers on it) to Card.
- Adhere sentiment to Card.
Here’s my finished card.

So off you go…..join in the Challenge with any of the wonderful Techniques you see while on this Blog Hop. Have Fun!
Click on this button to continue the Blog Hop with Kirsty

or page down to see other cards I have done using the Ink & Alcohol Technique.


Fabulous cards Chantel. Great technique.
Gorgeous cards alright! Thanks for the inspiration Chantell!
Beautiful flowers. I love the colors you used. I never think of doing this technique simply to use as a background. Nice idea.
WOW Fantasic.
Rach:)
I can’t wait t try this technique. Your samples are gorgeous!
I am blown away this is a fab tecnique!!! Thanks so much for a brilliant tutorial your work is wonderful xxx Jan
YAY! Thanks Chantell! I have used this technique for backgrounds, but never ever thought of using it for flowers etc! Great idea!!! Thanks!
wow fab card!! TFS!! I’m adding the alcohol to my list of things to get today whilst out shopping! I’ve got some re-inkers that I not used yet 🙂
gorgeous! Thanks for the inspiration! Aloha, Kim
This is such an amazing effect. Love your tutorial Chantell!
I love how you have matched your flowers and eyelet border, it looks great!
Lee x
How amazing. I haven’t seen this technique before. You have done a lovely job with it!!
Thanks Great tutorial.
Fantastic tutorial Chan, and the card that you made using the technique as a background and as the focal point is just STUNNING!
I’m lucky enough to have made the cute fishy card at one of our team days – yay!!
S x
Great technique, and who would’ve thought it was so simple to achieve such a stunning result?! Darn it, I thought I could get away without having to buy re-inkers; clearly I’m going to have to reconsider! Love this 🙂
Great ideas here! I have not thought to emboss the image onto my card before doing this technique before, so I will definately have to give that a try! So effective for the flowers! TFS
Beautiful cards – thanks so much for sharing this tutorial!
You’ve made such a beautiful card with this technique! TFS.
What gorgeous cards, thanks for sharing this tutorial.
This is so awesome, Chantell! I love all the examples you’ve given too. Gorgeous. xx
Ooolala! Love it! Thanks for the inspiration:)
Super technique thanks for sharing. Love your cards and I will have to give this a try.
Lovely Chantel. I love that effect on the flowers! just beautiful! Thanks so much for sharing! love keesh x
Great technique, great cards. I will be using this technique for sure in the near future. Thanks for sharing.
thanks for sharing this wonderful technique. I often want to try new things but need to be shown how-to first! great tutorial.
Great technique! I love the outcome!
I love this technique. Now I’ve got some re inkers I can have a go. Your cards are always stunning sis.
Thanks for sharing this great technique Chantell! I have not seen it explained before. Your card is stunning. TFS 🙂